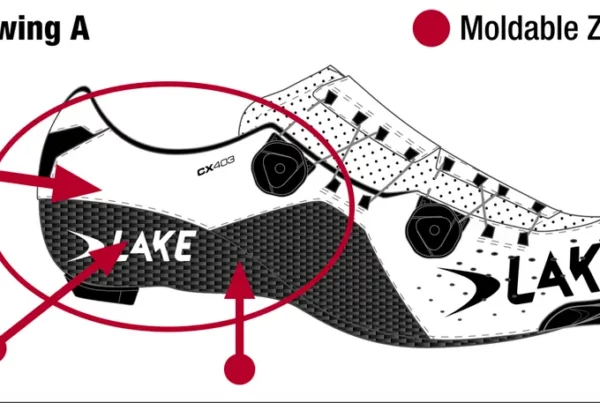
The most obvious variable in the foot support equation is the cycling shoe. They come in many different shapes, sizes and colours and can have soles of carbon fibre or plastic. Carbon fibre soles will provide a superior power transfer by minimizing shoe flex and foot deflection, especially while sprinting or climbing out of the saddle. Most uppers these days will be made from sophisticated synthetic materials that have good abrasion resistance and breath half decently. In regards to shape, some of the main differences will be the heel lift (the height of the heel when the toe is flat), the stack height of the toe from the sole and the width of the shoe.
Other differences will be the strapping system and the bag of the shoe or how much room there is for a foot inside. When it comes time to buy new shoes take care in selecting the right shoe for you. The most important aspect is simply the fit. They must fit very well. They will not get any more comfortable than the day you bought them, unless they have a mouldable sole that you intend to mould yourself later. If they are too tight, longer rides will become increasingly painful as the foot swells, if they are too loose it will be hard to maintain good pedalling form because the foot will be moving around. There is a shoe out there for almost everyone; you need to put in the effort to find the right pair for your feet. Other considerations should be the intended use and budget. Most shops have a good selection but I would recommend looking around and trying on as many shoes as it takes to find the right fit. If you are interested in finding out more about custom cycling shoes with mouldable carbon fibre soles check out Bont, they are Australian and the quality is top notch.
Once you have a fantastic fitting pair of cycling shoes you should take a look inside and remove the innersole. This part of the equation is particularly important because it’s what supports the contours of your individual foot. The foot should not collapse during the pedal stroke if it does your leg extension will be increased and the hip may drop. Most cycling shoes will have thin, floppy and very unsupportive innersoles in them to allow the manufacturer to claim a lighter weight than the other guy. After market footbeds are the way to go. Find something that supports your foot as perfectly as possible when it is un-weighted to keep your arch and metatarsal collapse to a minimum.
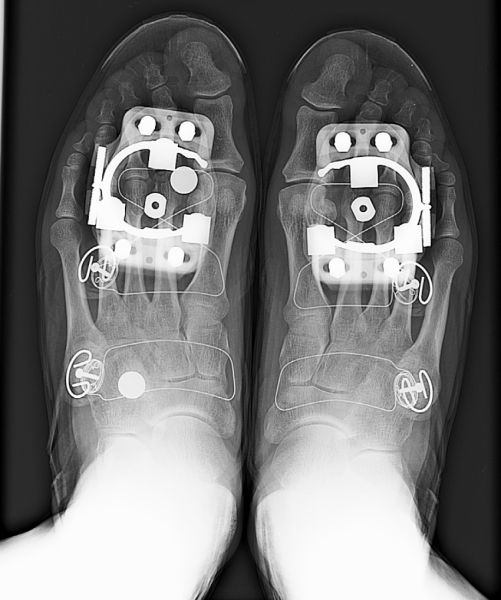
I use a Esoles when fitting, they have a choice of 5 arch heights and 2 metatarsal pad sizes, they can also be fitted with different combinations for the right and left feet. Like shoes there are lots of different pedal/cleat combinations out there, each offering pros and cons. Do your homework, talk to other riders and shop mechanics find out what works best for what are doing on your bike. There are three things to consider when mounting your cleats. Fore and aft, side-to-side and rotation. Fore and aft should be set so the pedal spindle rests between your first and fifth metatarsal joints when the shoe is level. This way when your heel or drops or your toe points you will still have some of the metatarsal band over the pedal spindle. An easy way to imagine this is to think of your foot on the pedal and look down. If you drop your heel you will see your first metatarsal rotate back and away from the pedal spindle and the opposite will happen when you point your toe down, your fifth metatarsal will rotate away and forward. This fore and aft position can be adjusted slightly to suit your particular pedalling style and cycling discipline; as well, note the difference in your feet, it is common that the right and left feet will have different bone structures. Remember if you have moved your cleats 3mm back you may need to move your saddle down 3mm to maintain the same leg extension.
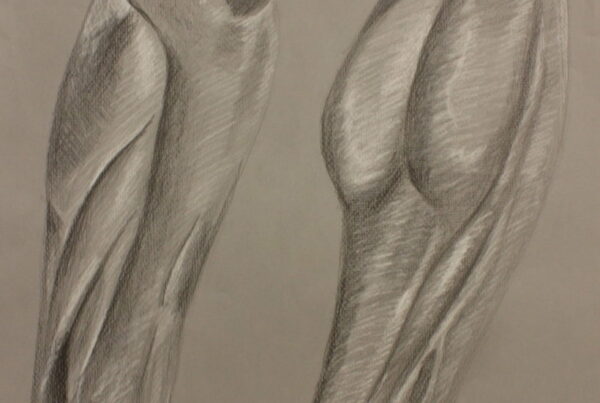
The side-to-side position will have an affect on knee tracking (the path of the knee when observed from the front) and ankle joint stability and it is dictated in part by the angle of the femoral head and the width of the pelvis. The best way to align the side-to-side cleat position is to center the knee as best as possible over the center of the foot. So when you are pushing over the top and through the pedal stroke the knee can extend with as little lateral movement as possible and the ankle is straight. Wobbly knees and ankles will not be able to support as much load as straight, strong joints. The hard part here is to accept your individual joint locations and functions and work with them as best as you can. Knee tracking and ankle alignment is different for every leg on every rider and some movement is common and healthy, and facilitates a natural pedal stroke.
When setting the rotation it is best to look at what your feet are doing at rest after walking on the spot. This exercise will allow your legs to be in their natural rotation and will be a great guide for the cleat rotation. If your heels are in, rotate the cleat the opposite way to gain the desired effect, so toe of cleat in. If your heels are out, rotate the cleat toe out. To check the correct rotation has been achieved, pedal hard for a few hundred meters and stop with the foot in question forward or at 3 o’clock or nine o’clock in the pedal stroke and move the heel from side to side, ideally you want an even amount of float on both sides of the heel. There should not be any pressure from the pedal pushing the foot into an uncomfortable or unnatural rotation this will cause pain due to the uneven loading of the joints in the leg.
This is just a quick guide to get you in the right shoe and in the right zone with your cleats. Cleat position is a vast topic and there are an infinite number of ways to set them, including shimming and wedging and even mid-foot (under the arch) cleat position. The best way to make changes to your shoes and cleats is to do small things, one at a time and be very clear about how they affect your ride. Keep moving towards adjustments that feel good and allow for a smooth rotation.
Originally posted on ManlyCC